
|
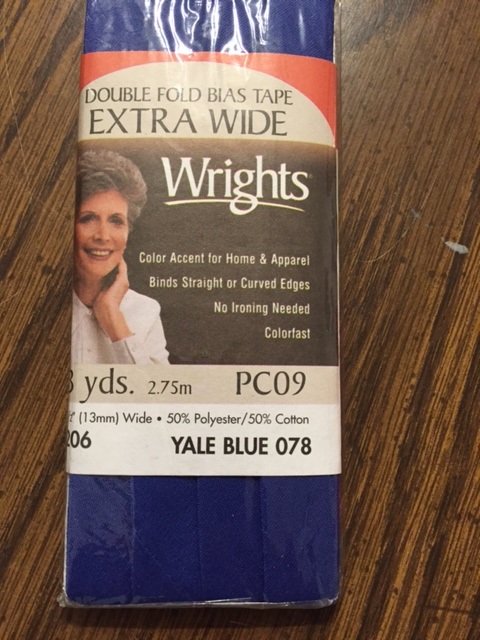
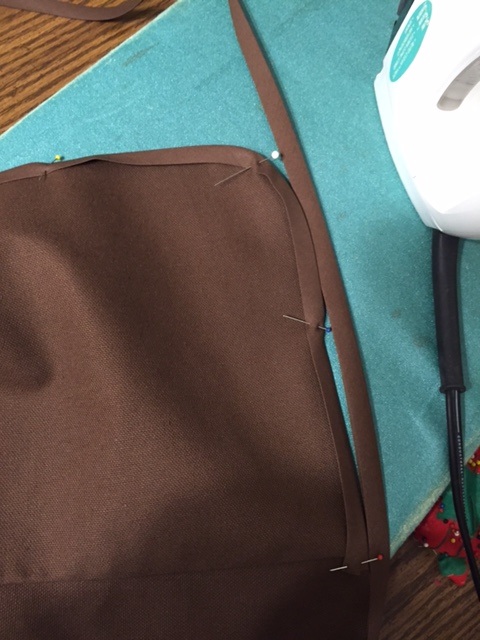
I love being involved in my daughters Girl Scout Adventures. She recently just bridged over to become a brownie from a daisy; along with two other girls from our troop. Of course with that comes the need for new vests in the mahogany brown color that represents the Brownie Girl Scout. I decided to make them myself for all the girls because they are a bit pricey to purchase directly from the GS store. I decided to look for an actual licensed pattern on ebay, they are vintage due to the fact that the Girl Scout Council removed them from the market years ago.  I hit the jackpot on an unused pattern for vests, sashes, blouses, shorts and skirts. If you didn't have access to the licensed pattern there are great vest patterns you can download and print on Pinterest as well. As long as the vest is made with a good strong material and isn't buttoned in front I'm sure no one will be the wiser. Here is a link to a nice pattern for size 7/8 I found on Pinterest; created by SweetKM. Vest Pattern. Just don't do all the extra quilting and such. All you need to do is cut the two front pieces and the one back piece, sew together at shoulders and sides then sew the double fold bias tape around the edges as I have shown in the images below. I always iron the bias tape to match the curves before I pin it on and sew it. Here is a good youtube video showing how to attach the bias tape (binding): Tips for Sewing Continuous Double Fold Bias Tape. Below I have blue bias tape shown, but I used the matching brown color to the material. I try to buy the material, bias tape and thread all in the same trip so I can match the colors correctly. I found some heavy brown fabric that worked well even though the licensed fabric is no longer available. I think it feels like a lightweight canvas but I know that's not the technical term. Some posts I have seen suggest to use regular quilting calico fabric for the vest. Here is a forum discussing the girl scout fabric as well: http://sewing.patternreview.com/cgi-bin/sewingclasses/board.pl?t=4488
I hope you find all these links and ideas helpful. I was able to make 3 vests for approximately $28, normally they cost around $20 each + shipping from the council so I think I did pretty good with making them myself. Time is of course donated being that I am a troop leader but I like to help out the families that are a part of our troop as much as possible.
0 Comments
It has been some time since I have had a new post. I have been super busy with work, girlscouts, laying out a children's book, and a whole lot of housework and family duties. Seems like I don't get a minute to myself but I'm always amazed at how much I can accomplish in one day. This morning, after my workout, I dedicated some time to getting the kids each a teacher gift. The end of the year is here and I wanted to show their teachers how much we appreciate all they do. I found two wonderful ideas on Pinterest that I would like to share with you. The first is You Are TOTEally Awesome! The second is Thanks for making learning SWEET. The gift I want to start with is the candy bar wrap. I created this wrap to fit a 5 or 6 pack of mini Hershey's bars. It may also fit one of the wider super large candy bars as well.
The measurements for this wrapper is 5" wide x 8" long to wrap around package. You simply print, cut, wrap and tape then you are finished. The pdf printable is found below with the other printable files. The next project is a little more involved if you want it to be. I had some new Thirty-One bags on hand for gifts so I used two of those but here is a link to another blog with a great Tote bag pattern that is insanely easy and I do plan on making some myself just because. Reversable Tote Link I created some cute tags you can print to cut out and attach to the tote you decide to use. I also filled my totes with assorted teacher supplies and of course chocolate. You can choose to just gift the tote. It is an amazing gift on it's own. I created a new design for the tags, there is also a different version included in the blog that I got the Tote tutorial from. Feel free to use hers if you prefer that style. Unfortunately I wasn't able to get any photos of the totes I set up because we were running late this morning and I had to rush out the door. There are some great pictures on the tote blog if you click on the link above. Thank you for taking the time to visit my blog and I hope to include more creative projects in the near future.
|

Hello!I'm Michelle, a wife, mom and full time graphic designer. I have been working in graphic design for over 20 years. I like to share things about my everyday life and projects I'm working on. Hopefully some of what I share can be valuable to you as well. You can learn more about me here.   Archives
January 2022
Categories |


 RSS Feed
